Transmission fluid is most important part of the transmission system, this ensure that the gear shifting’s are smooth, cooling components runs fluently and prevent excessive wear and tear in engine. Doesn’t matter what you own automatic or manual both of them requires regular change of transmission fluid. this on time change can keep your vehicles away from regular repairs.
In this guide, we’ll tell you step by step process of how to check transmission fluid in both traditional dipstick methods and modern sealed systems.
Why Checking Transmission Fluid Matters?
Before we talk about how to check transmission fluid it is important to know why checking transmission fluid matters. The transmission fluid is required for the optimum working moving parts, dissipates heat, and acts as a hydraulic fluid to engage gears the degraded fluid or no fluid can degrade engine combustion and life of pistons in engine.
Usually, almost every manufacturer recommend checking transmission fluid every 30,000 to 60,000 miles. But if you carry more heavy loads or drive it regularly then you will need to check it more often like 8-9 months. There are some symptoms which can make you notice you need to change the transmission fluid are delayed shifts, unusual noises, burning smell or reddish-brown fluid.
Checking Fluid in Automatic Transmissions with a Dipstick
This is the simplest method of checking transmission fuel, most of the vehicles built before mid-2010s feature a dipstick making it simpler to check.
Initial Vehicle Setup
For this method park the vehicle on the ground and even surface to make sure it has even fluid distribution. Then start the engine for five to ten minutes till it reaches normal operating temperature of around 100-120°F.
This will mimic the real driving conditions making it idle for checking the fluid. Remember if the manual specifies an engine-off check before test them follow that instead to avoid overestimation.
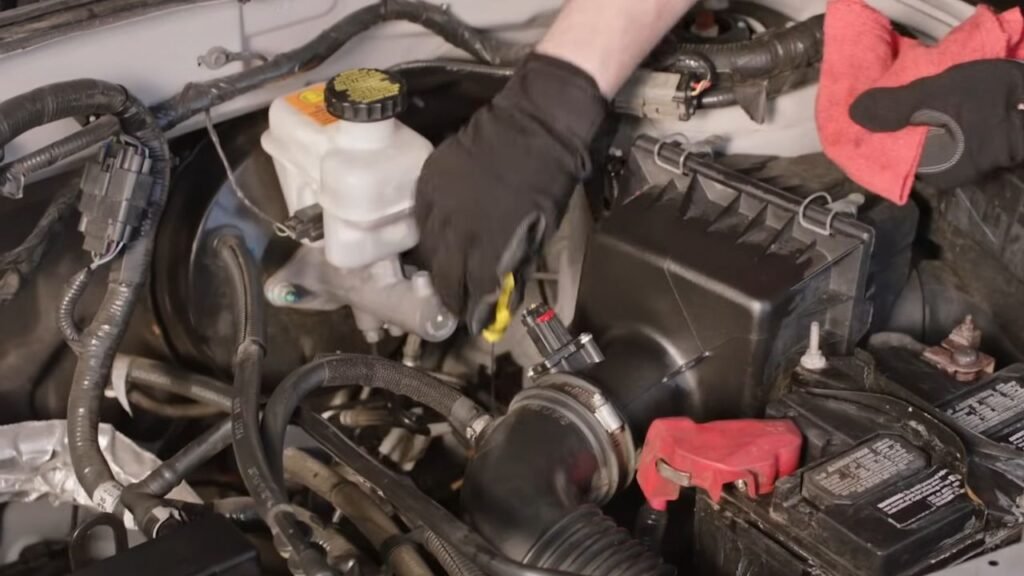
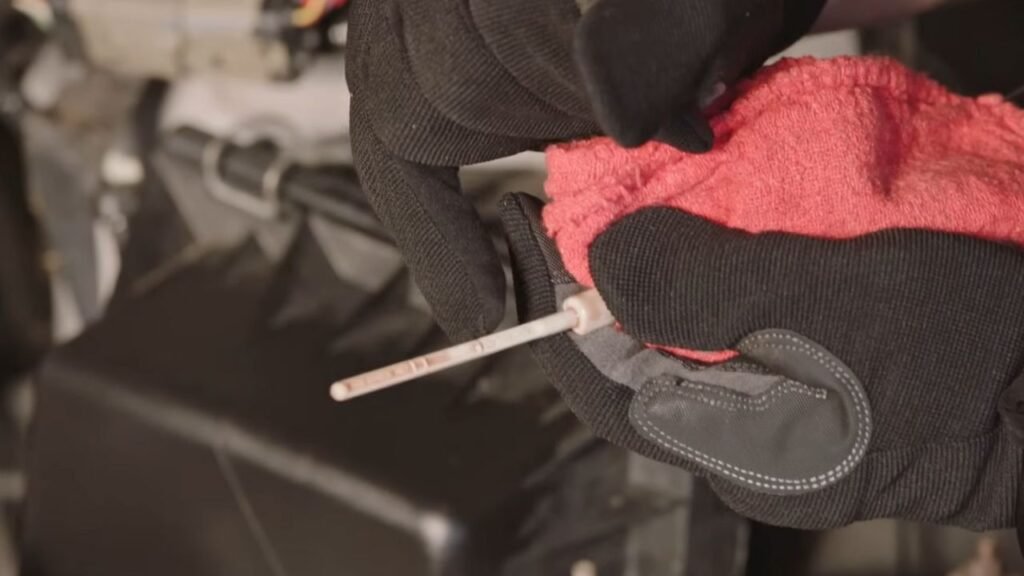
Locating and Inspecting the Dipstick
Open the front hood and identify the dipstick, mostly it is placed near the rear of the engine bay on passenger side. open that lid and pull the dipstick steadily from that. Wipe this dipstick with cloth to make sure it is clean and residue free. Then once again dip it back fully and then take it out and check it against the given marking. The transmission fluid should be upto “Full Hot” or upper notch; below the “Add Hot” line indicates low volume.
Examine the fluid’s color and consistency
You must check the fluid’s color and consistency on the dipstick tip it should appear like bright red or pink and must be slick like when you inserted. If it is dark brown or smell like burning then it suggest contamination or overheating and changing.
Procedures for Sealed Automatic Transmissions
Modern vehicles have started such type on sealed transmission fluid storage like Honda, Toyota, and European models.
- Warm the Fluid: Drive 10-15 minutes to reach 86-122°F (30-50°C), confirmed via infrared thermometer on the pan or OBD-II scanner for precise computer data.
- Secure and Elevate: Park level, set parking brake, shut off engine, and jack up the front safely with stands for underbody access.
- 3.Locate Plugs: Identify the check/fill plugs on the pan side (e.g., 10mm bolt or 5mm Allen); remove fill plug first, then check plug with engine off—if fluid drains, it’s full.
- Check Level Running: Restart engine, idle in Park; remove check plug at target temp—steady dribble means correct; dry hole indicates low.
- 5. Add Fluid: Pump in ATF slowly through fill port until slight overflow from check hole; add incrementally to avoid overfill.
- Reinstall and Circulate: Torque check plug (20-30 ft-lbs), then cycle gears (Reverse 5s, Drive 5s, Neutral rev 1,500-2,000 RPM) with brakes on.
- Recheck and Test: Verify overflow post-cycle (noting thermostatic valves), reinstall plugs, lower vehicle, and test drive; recheck if needed.
Check every 30,000-60,000 miles or for symptoms like shifting issues; seek pros if unsure to avoid damage.


